How to Import PST File to Office 365 – Manual Migration
Microsoft Office 365 has many advanced features like Real-Time co-Authoring (Word, Excel, Powerpoint), Business clouds to store data in the cloud server, and you can access anywhere any time. So many organizations are now switching to Office 365 (Exchange Online). Here in this blog, I will describe the easiest way of How to Import PST File to Office 365. Just follow the given instructions to make migration easy.
Part 1: Give Sharing Permissions to the folder where PST files are Stored
Here you need to give the sharing permission to your folder where your PST files are stored in your PC, for doing the same please follow these steps.
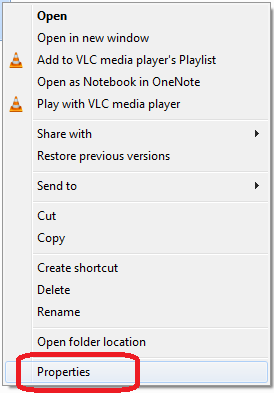
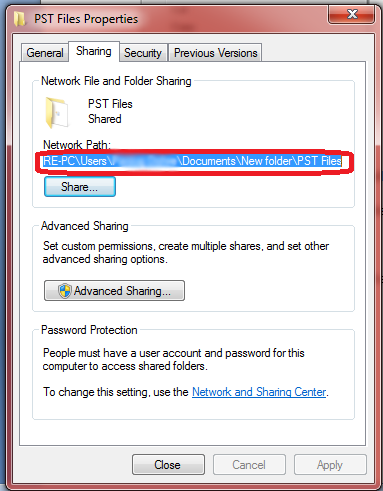
- Fist, select the Folder where your pst file saved and right-click on the mouse and then go to Properties.
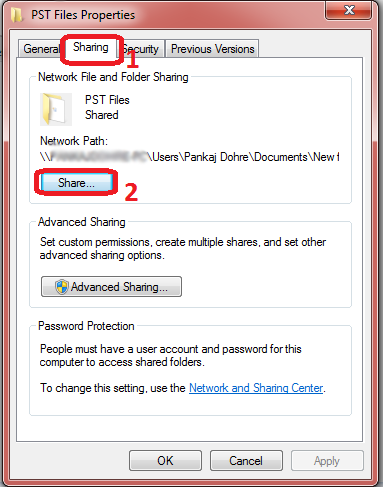
- Once you click Properties a popup will appear on the screen, select Sharing >> Share.
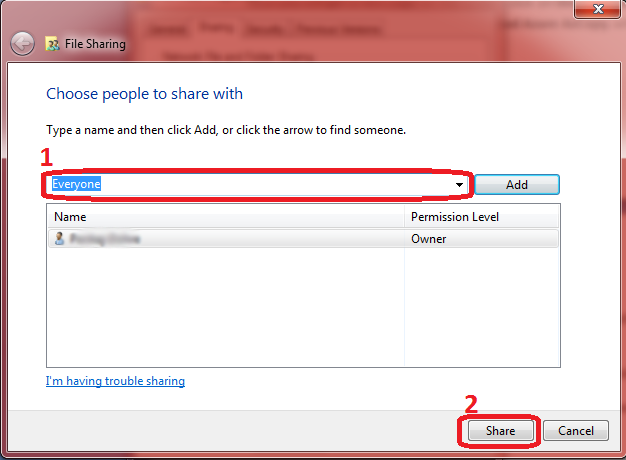
- Now Choose the People & Add to share this file and hit Share.
- Click on Done.
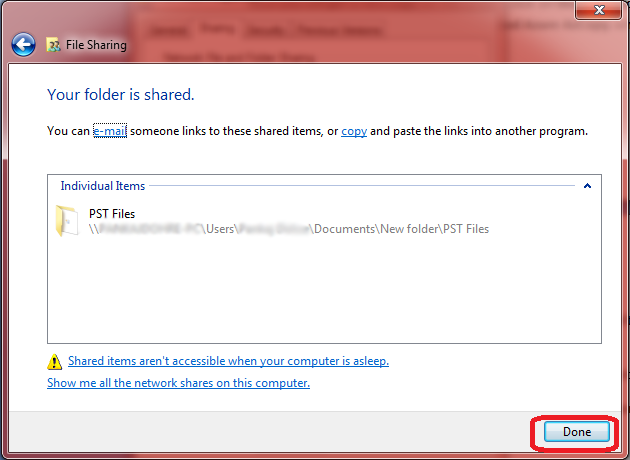
- When it’s done, copy the entire Network Path and paste it on the Notepad.
Part 2: How to Import PST File to Office 365 manually
- Open your office 365 and login to your admin account.
2. Once you login then clicks on Admin Center and select Exchange.
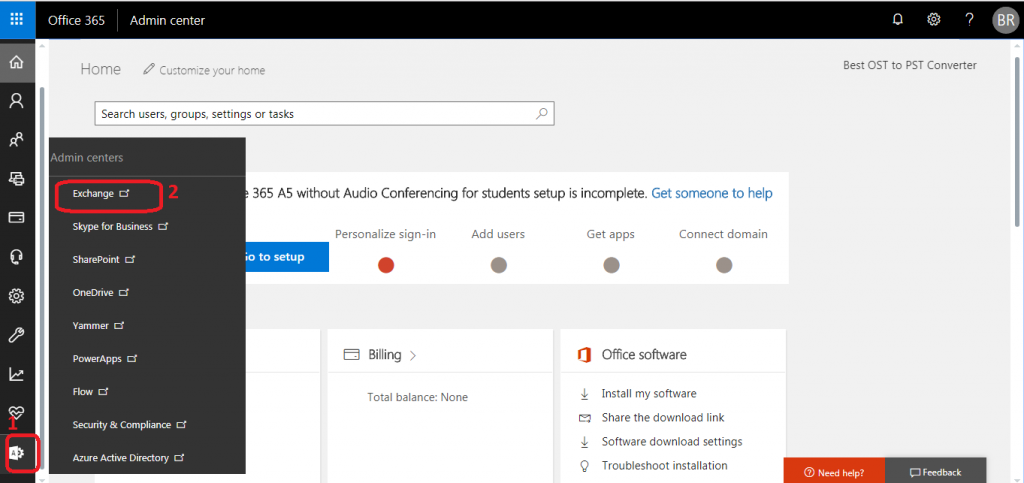
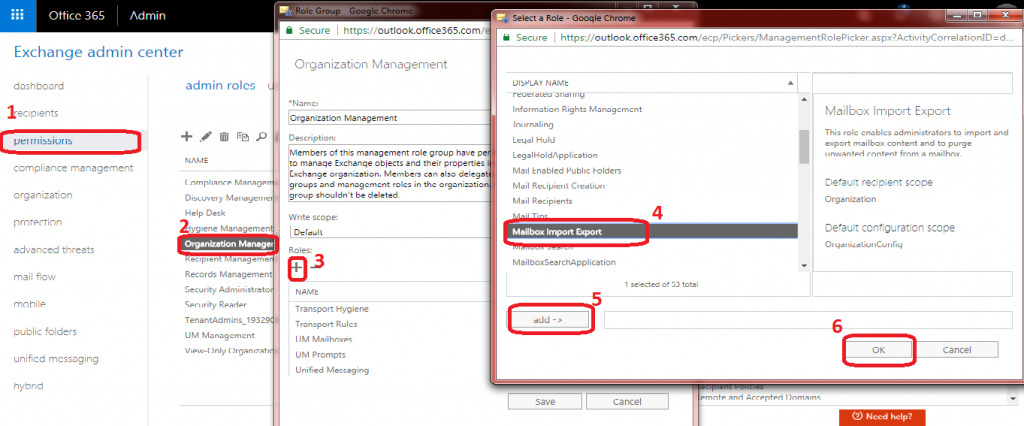
3. Now a new window will open on the screen Exchange Admin Center >> Permissions>> Organization Management a list will appear then select “Mailbox import-export” option.
In case the Organization Management list not open then double click on Organization Management a pop up will appear on the screen and click on the + icon then select the Mailbox import export click Add and Ok.
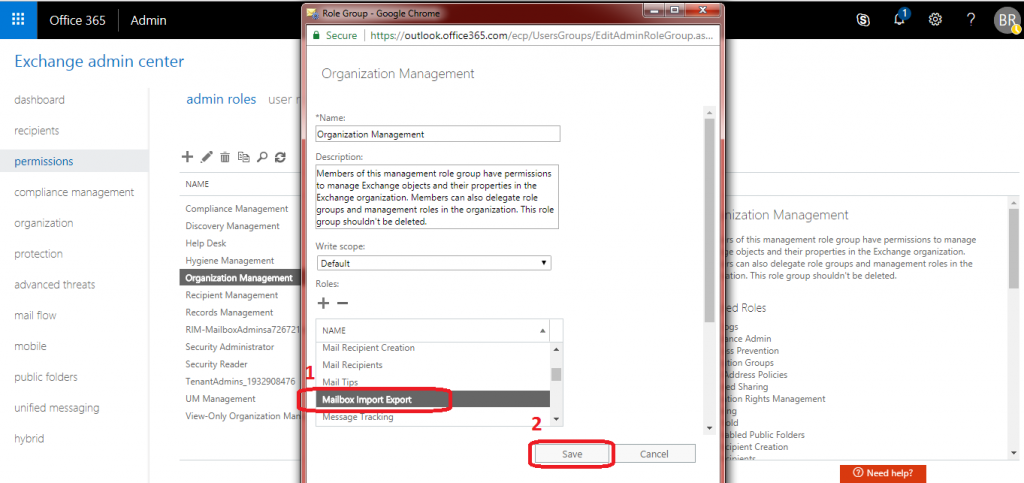
4. After that select Mailbox import export again>> Save.
5. Now go to office 365 Admin Center >> Setup>> Data Migration now click on Upload PST file.
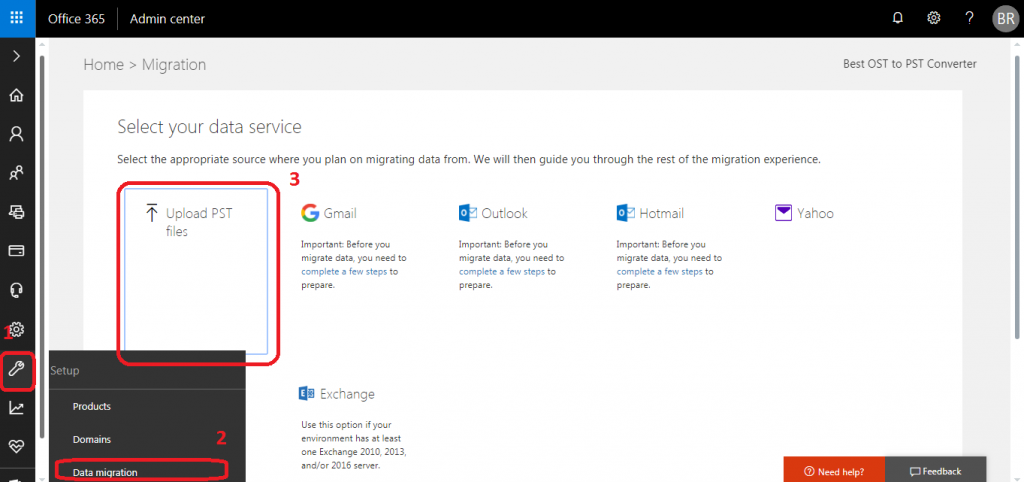
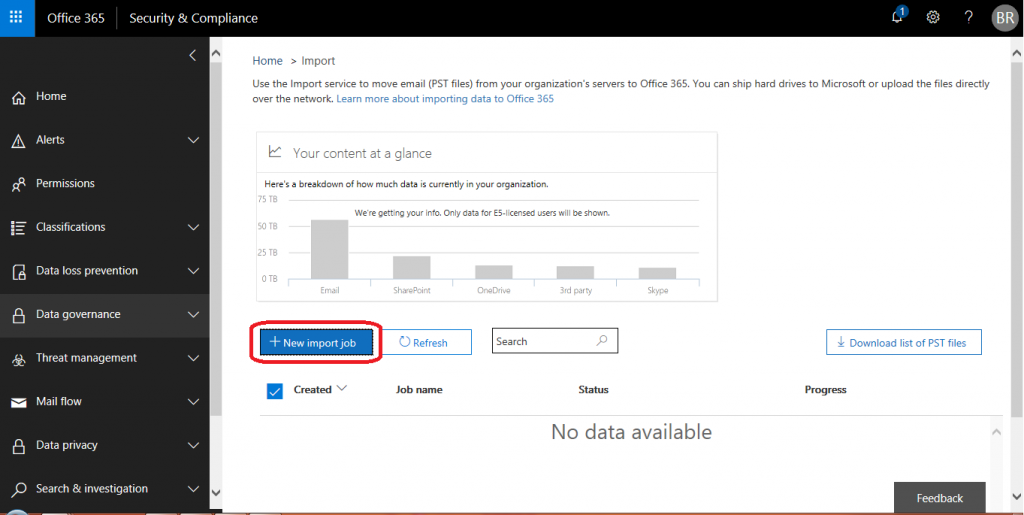
6. When you click on Upload PST file a window will open, then select New Import Job.
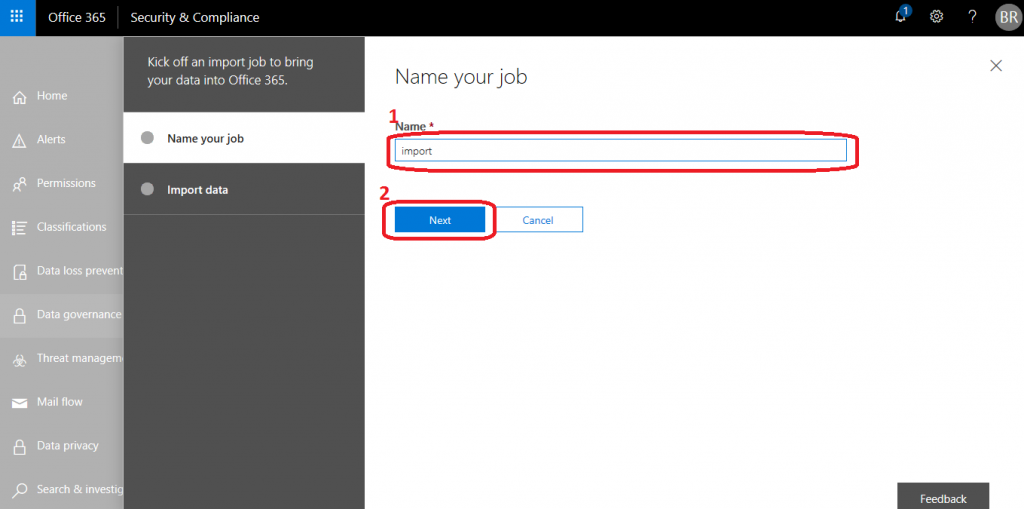
7. Type the name of your job like import.
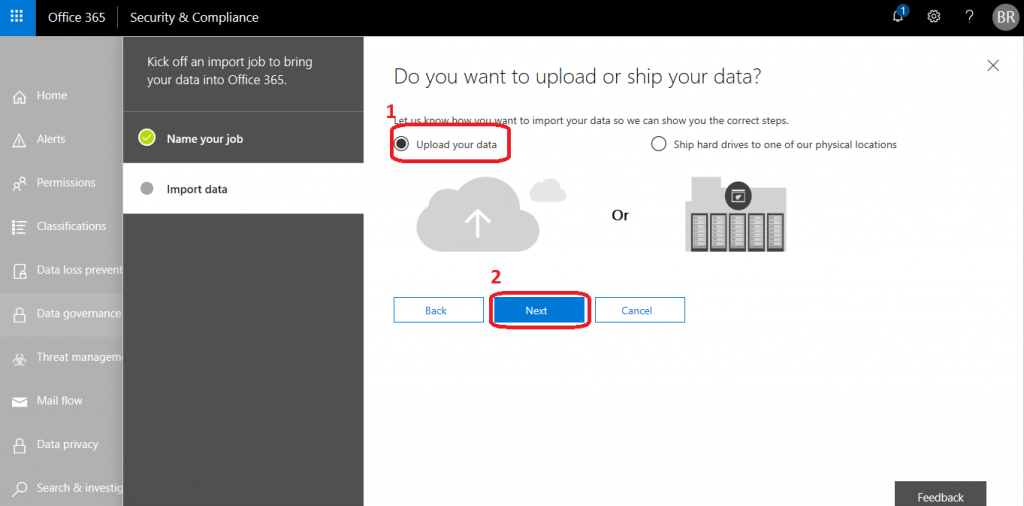
8. Click Next check on Upload Your Data and hit Next.
9. Now you will get a new page on the screen, click Show Network Upload SAS URL, and copy the URL or paste it on the notepad after that, go to Download Azure AzCopy. when the file is downloaded just installed and open Microsoft Azure window.
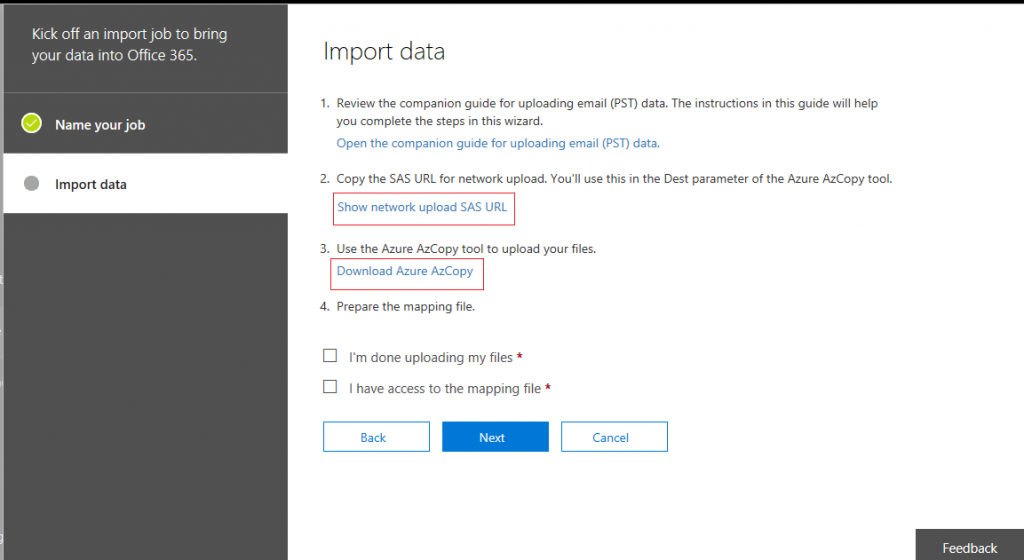
Type the given command on Azure tool.
AzCopy.exe /Source:\\network path /Dest:”SAS URL” /V: give a location where you want to save log file \AzCopy.log /Y
Note: Where Network path is the folder location we got in part 1 after giving the sharing permission.
Sample code:
AzCopy.exe /Source:\\DESKTOP-MPKVU38\Users\le\Desktop\Import /Dest:"https://476d07f3b7d444a7a00a5a7.blob.core.windows.net/ingestiondata?sv=2015-04-05&sr=c&si=IngestionSasForAzCopy201806090656050007&sig=hccYVWvlkOhp6FISVYywwt9W9YlzRoQfXqGZvq14jqM%3D&se=2018-07-09T06%3A56%3A09Z" /V:c:\Users\le\Desktop\AzCopy.log /Y
Press enter
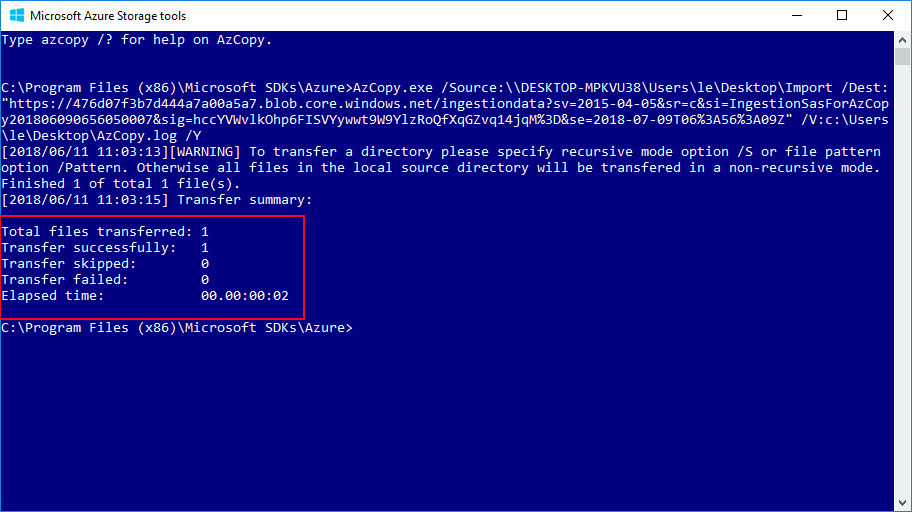
10. Now It’s done. Your PST files have been uploaded to Azure storage. Close the window and go back to the desktop open the MS Excel and create a CSV file like this:

11. Open your Import Data window and check on both option and click Next.
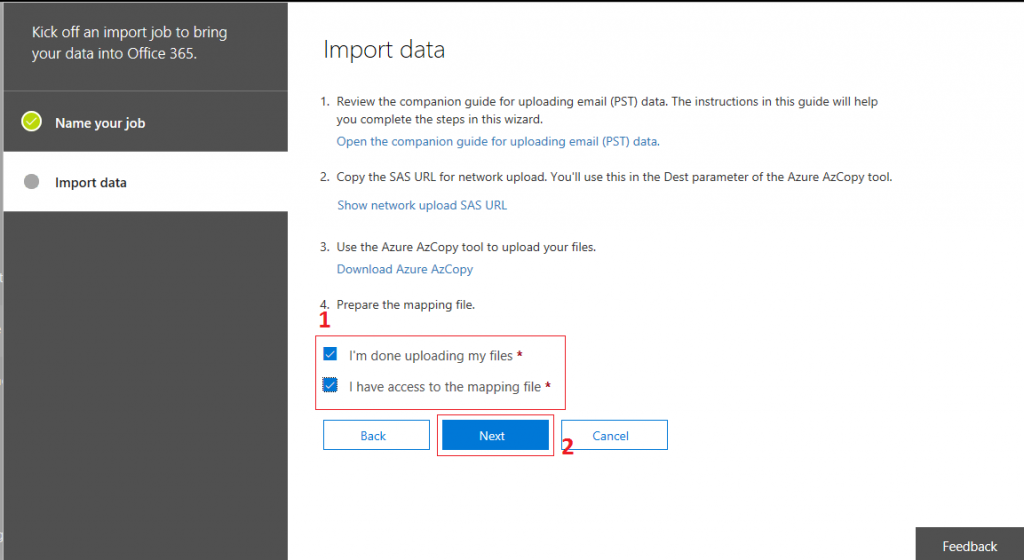
12. Once you hit on Next new window will come on the screen then upload the CSV file which one you have created for this import job. Click on Select mapping file and upload CSV file >> Validate>> Save.

13. Now your PST file successfully uploaded into Office 365 and at last click on Close.

Note: All the above steps are required in order to import PST file to Office 365 using network upload. But if you are not comfortable with PowerShell and Azure AzCopy tool then I will suggest you use a third party PST to Office 365 migration tool.
Conclusion:
In this post, I have discussed all the possible ways that how to import PST File to Office 365. If you have any doubt while importing the PST file’s data in Exchange Online (Office 365) then leave your message in the comment box.
